Email Setup Guide
- Entourage for Macintosh OSX - IMAP
Last modified: October 13 2005 11:39 am
[  Print Page ]
| To begin open Entourage |
|
|
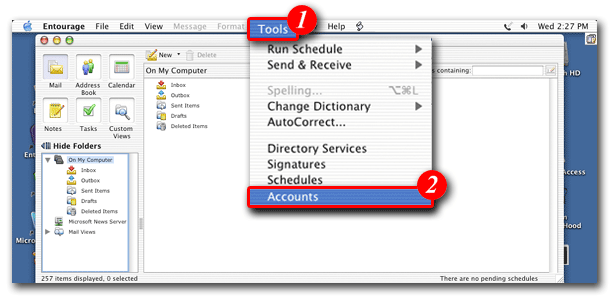 |
| 1)On the menu bar, click 'Tools'. |
| 2)Select 'Accounts'. |
|
|
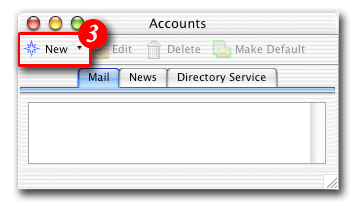 |
| 3)Click the [New] button to add a new account. |
|
|
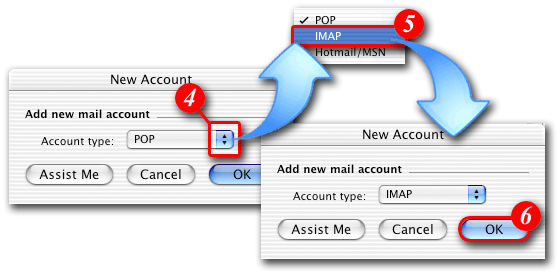 |
| 4)Click the drop-down arrows. |
| 5)Select 'IMAP'. |
| 6)Click the [OK] button to continue. |
|
|
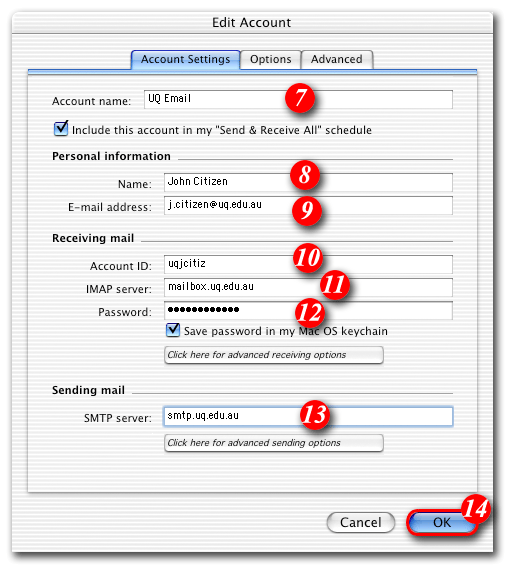 |
| 7)Enter a name for the account. (You can type in anything you like in this field, but it's a go.d idea to enter something that will allow you to easily identify the account). |
| 8)Enter your name as you would like it to appear in outgoing e-mails. |
| 9)Enter your e-mail address. |
| 10)Enter your 'email address '. |
| 11)Enter 'mail.tagsyoureit.dog' as the IMAP server. |
| 12)Enter your 'Password'. |
| 13)Enter 'smtp.tagsyoureit.dog' as the SMTP server. |
| 14)Click the [OK] button. |
|
|
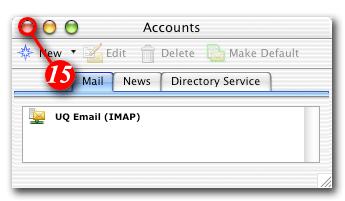 |
| 15)You should now see your account in the Accounts List (shown above). When you have finished with this screen click the top left button to close the Accounts window. |
|
|
 |
|
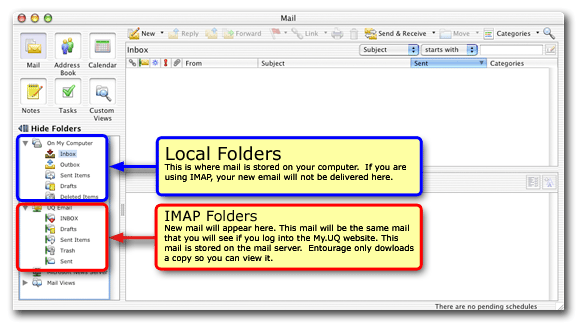
Your IMAP account will create a new set of folders (these
are a copy of the folders you would see if you logged into the webmail web site). Any new e-mail
delivered to your e-mail address will appear in the Inbox of your IMAP
account, and will also be accessible in webmail until it is deleted in
either program. |